Overview over Hot ICN Research Topics on our Institute

Persistent Interests
Sending an Interest for each Data packet can lead to inefficiencies with respect to overhead and response time. Therefore, the concept of Persistent Interests (PIs) or Long Term Interests was introduced. The idea behind PIs is that multiple data packets are requested with a single Interest. This reduces the network overhead and relieves the network Read More ...
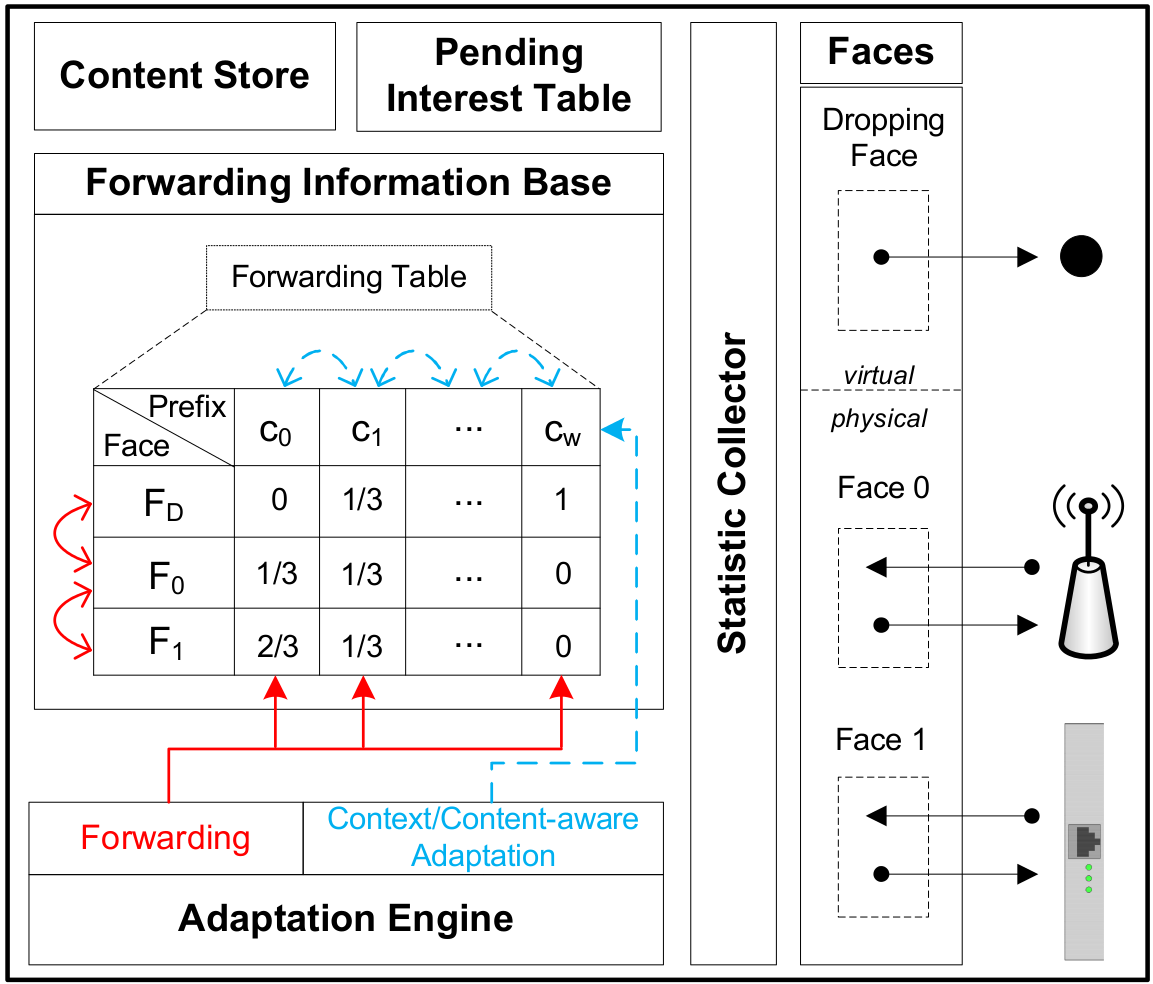
Stochastic Adaptive Forwarding
Stochastic Adaptive Forwarding (SAF) is a forwarding strategy for Named Data Networking (NDN) developed at ITEC. It has been specifically designed to meet the following objectives: Perform stochastic adaptive forwarding on a per-content/per-prefix basis. Provide effective forwarding even with incomplete or partly invalid routing information. Deal with unexpected network topology changes, e.g., link failures, without Read More ...

NDN Testbed
This section will guide you through the setup of your very own Banana Pi Router network. It is the result of our discoveries from putting together our first Pi Router to interconnecting twenty of them while tweaking an original Linux Bananian image (source) to our needs. The latest micro SD and SSD images can be found in Read More ...